Mr. Handyman guides homeowners on installing and painting crown molding for a polished look.
|
Crown molding is to a room what a crown is to royalty—it adds distinction, beauty and the perfect amount of class. While installing and painting crown molding might seem a bit intimidating at first, it’s absolutely doable, and may we add, surprisingly satisfying, once you have the right tools and a few smart techniques.
Whether you’re a first-time fixer-upper or just looking to level up your skills, these handy tips will help you tackle your project with confidence. Here’s how you can transform any space with a little guidance from the pros.
First, Choose The Right Crown Molding for Your Space
When selecting your room's crown molding, consider the style you’re going for, along with your experience level. Two-piece molding adds elegance to areas such as living rooms and dining spaces for a more formal look. One-piece molding is a great choice for bedrooms or even kitchen updates such as crown molding for cabinets, which can add an updated, custom feel without the hassle or expense of a full remodel.
To get a feel for what you want, visit your local home improvement store or nearby model homes to view a wide variety of styles and selections (remember to have fun with it!). Look for pre-primed molding to cut down on painting time and avoid any warped or damaged pieces. If you prefer a natural style rather than a painted one, look for higher-quality, stainable options.
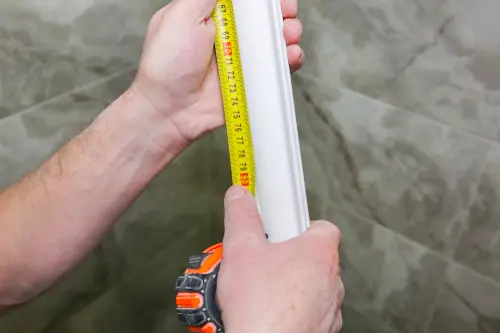
Take Your Time: Measure and Cut Accurately
Crown molding is available in 8', 12', and 16' lengths. Whenever possible, use the longest pieces to minimize the number of seams and joints. Shorter pieces require more seams, which can be difficult to hide and could affect the final appearance of the room.
To create clean cuts for corners and joints, invest in a power miter saw rather than struggling with a handsaw or a basic miter box. If you prefer not to buy, ask your local home improvement store about rental options. Use templates and measure carefully to avoid mistakes.
Simplify Installation with Decorative Corners
For beginners, consider using decorative corner pieces. These pre-made corner blocks add a decorative element to your room while eliminating the need for complex angled cuts in every corner. They’re especially helpful in square rooms where corners are prominent. Even if you’re an experienced DIYer, these pieces can save time and ensure a precise fit.
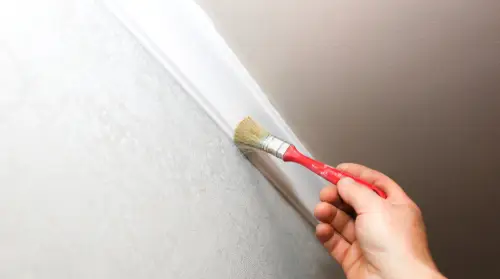
Paint Crown Molding Before Installation
Painting crown molding while it’s still on the ground is much easier than tackling it once mounted. If your molding isn’t pre-primed, apply a quality primer first. Then, apply two coats of semi-gloss paint that matches the rest of the room’s trim. Let it dry completely before moving on to installation.
Looking for design inspiration? Check out these home painting ideas for crown molding and other accents to help you choose colors that complement your space.
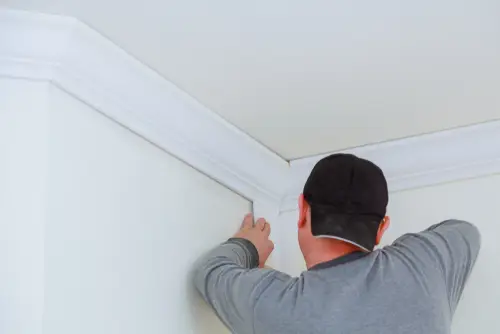
Install Crown Molding Like a Pro
Secure the crown molding to the wall using finish nails—2” 8d nails work well for most installations. Place nails about ½” from the edges, driving them through the molding and into wall studs for a secure hold. At the ends of the molding, drill pilot holes first to reduce the risk of splitting.
For a clean, professional finish, use a nail set to sink the nails below the surface. Fill holes with wood filler and sand lightly once dry. Apply a final coat of paint to blend seamlessly.
Caulk for a Seamless Look
Walls and ceilings are rarely perfectly straight or even, so you may notice small gaps after installation. Use caulk to fill these gaps for a polished appearance. Over time, as your home shifts with seasonal changes, you might need to re-caulk to maintain a seamless look.
Learn more about caulking trim around your home in our blog post.
Common Mistakes to Avoid
Watch out for these common DIY mistakes when planning and installing your crown molding:
- Using short pieces of molding to save money: This can create more seams that are harder to hide.
- Skipping the primer: Painting without priming can lead to uneven coverage.
- Ignoring wall and ceiling imperfections: These will become more noticeable once molding is installed, so caulk thoroughly for a clean finish.
- Rushing cuts and measurements: Take your time to avoid gaps or misaligned corners.
If you’re considering adding crown molding but would like professional help, Mr. Handyman® is your trusted choice. Our experienced service professionals arrive on time, in uniform, and with the tools needed to complete the job right the first time.
This article is intended for general informational purposes only and may not be applicable to every situation. You are responsible for determining the proper course of action for your home and property. Mr. Handyman is not responsible for any damages that occur as a result of this blog content or your actions. For the most accurate guidance, contact the Mr. Handyman location nearest you for a comprehensive, on-site assessment.
FAQs About Crown Molding Installation
Mr. Handyman has been helping homeowners and businesses repair, maintain, and enhance their spaces for over 25 years! We are the one-stop solution for everything on your to-do list. This includes answering your questions about home repairs, maintenance, and improvements. Here are answers to some of your most frequently asked questions about how to install crown molding.
What is the best paint finish for crown molding?
Semi-gloss or high-gloss finishes are best for painting crown molding. They’re durable, easier to clean, and provide a classic look that highlights the trim.
Can I install crown molding on uneven ceilings?
Yes, you can install crown molding on uneven ceilings. You’ll likely need to use extra caulk to fill in gaps caused by the uneven surface. Sanding the ceiling can help smooth out small imperfections to create a more flush surface for your molding. Consider using a flexible molding or some backer blocks to help with alignment.
Should I paint crown molding before or after installation?
Priming and painting crown molding is much easier before crown molding installation. Apply at least the first coat of paint with the molding on a flat surface. After nailing and caulking, apply a final coat to cover nail holes and seams.
Do I need to hire a professional to install crown molding?
While handy homeowners can tackle a crown molding project if they are up to the task, professional crown molding installation can save time and ensure a precise, polished finish, especially in rooms with tricky angles. If you are unfamiliar with installing crown molding or need some guidance on how to paint crown molding, a professional handyman can help you complete the project with confidence.
How do I handle coping inside corners?
Coping involves cutting the molding’s profile so it fits snugly against the adjoining piece, creating a seamless corner—like a puzzle piece! This technique allows you to avoid needing to cut two perfectly matched angles while still presenting a clean, flush look in your corners.
- Cut one piece of crown molding square. Butt this piece against one of the corner walls.
- Cut a miter on the second piece. Using a miter saw, cut the end of the second piece of molding at a 45-degree angle, just like a mitered joint.
- Cope the profile. Use a coping saw to carefully remove excess material along the profile line of the mitered cut. Your goal is to create a shape that will fit flush against the first piece of molding.
- Test the fit. Make any necessary adjustments with a file or sanding block to achieve a seamless connection between the two pieces.