Mr. Handyman explains where not to caulk around windows to prevent damage and ensure proper ventilation.
|
If you’re planning to replace just a few windows or want to do some maintenance on the ones you have, the window experts at Mr. Handyman® have some helpful window caulking advice.
Proper window installation requires sizing, setting, and caulking to promote good airflow in your home. Accidentally sealing the wrong parts of your windows could lead to costly damage. This guide will show you where not to caulk around windows to save time and money in the long run.
Should You Caulk Around Windows?
Yes. Caulking around windows can prepare your home for the winter and summer months, stopping air leaks and reducing heating or cooling loss.
As long as you don't caulk where you shouldn't, caulking as part of an overall window weatherproofing project helps you spend less on energy and keep you or your family comfortable throughout the year.
If you're performing maintenance on existing windows by replacing the old caulk, these tips will help make the project more efficient. You'll learn where not to caulk and how to create a weather-tight seal for your old windows that will help reduce heating and cooling loss.
Our Top Window Caulking Don'ts
Caulking helps seal gaps and keep out drafts, but using it in the wrong spots can do more harm than good. Mistakes can trap moisture, leading to rot, mold, or stuck windows. To avoid headaches, follow these caulking tips.
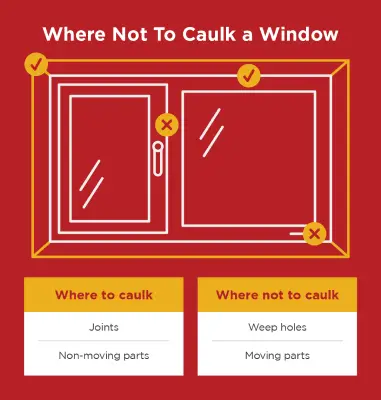
Don’t get caulk in weep holes
Before installing windows and applying caulk, check to see whether your windows have weep holes. While the majority do—wood, vinyl, and metal window frames included—some manufacturers sell styles that don’t. These windows usually have a sloped lower sill that redirects water away from the windows.
Weep holes allow moisture behind the window to exit the frame. If you caulk over them, the moisture has nowhere to go. So, if you want to avoid costly repairs down the road, keep caulk away from window weep holes at all times.
Don’t caulk around window trim
Many modern homes have trimmed-out windows that sit above the siding. Generally speaking, you should never caulk this type of window. Sealing the joints provides no benefit. The trimming already redirects excess moisture away from the windows; adding caulk could lead to moisture getting trapped inside, leading to damage you may not discover until it’s too late.
Don’t apply caulk on moveable parts
Caulking movable parts may cause your window to seal shut or impede its operation. The ledge above the window frame also doesn’t need caulk. This area has a drip edge that helps keep the frame dry. Leave the top of your window caulk-free if you are replacing siding or framing.
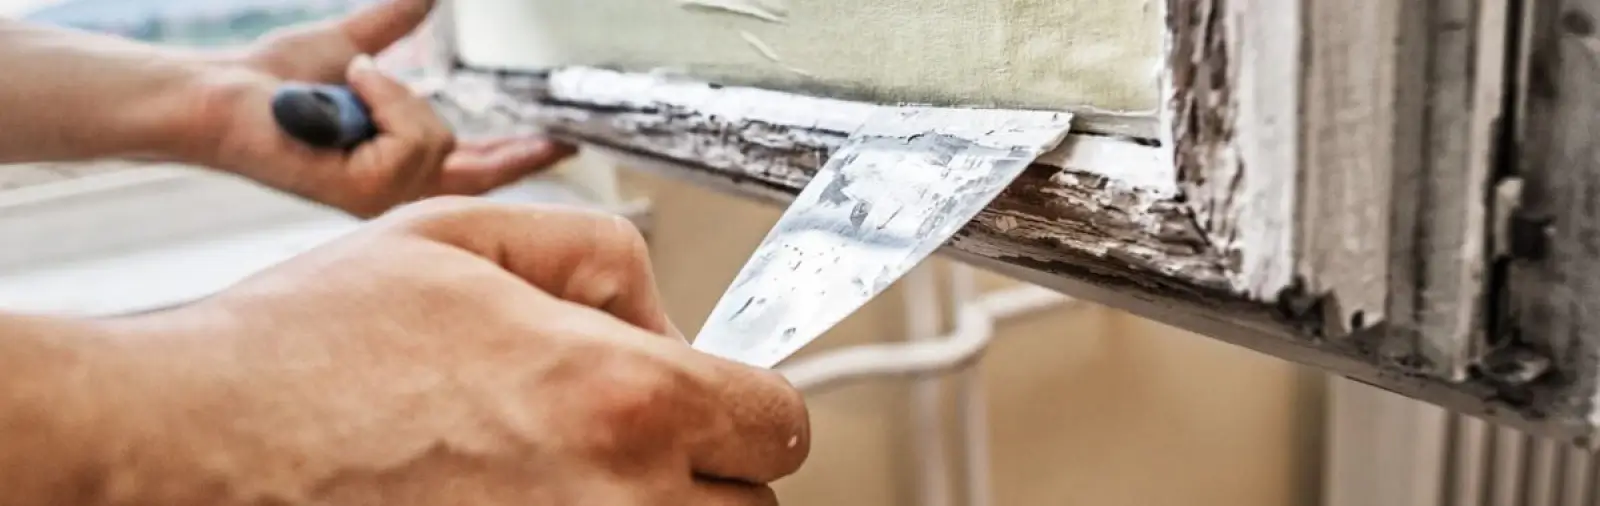
Don’t caulk over old caulk
Unfortunately, there are no shortcuts or workarounds for this tip. You need elbow grease, patience, and the proper tools to remove old caulk effectively. Tackle loose window caulk first by prying up a corner with your putty knife. Once you get a grip, use your needle-nose pliers to peel away as much old caulk as possible.
If the caulk removal becomes more challenging, try a razor knife or sharp scraper, but be careful. Always direct the blade away from you and keep your free hand out of harm's way. Wear eye protection, too. The work is tedious, but the extra effort will save you money and time down the road.
Once you've removed the old caulk , scrub away the remnants with a stiff brush. You may need to use 90% rubbing alcohol to remove any remaining residue. Be cautious not to get the rubbing alcohol on other surfaces.
More Window Caulking Tips from the Pros
Now that you know where not to caulk around windows, how about some pro tips for where you should apply caulk? Let's review some of our field-tested tips for caulking windows.

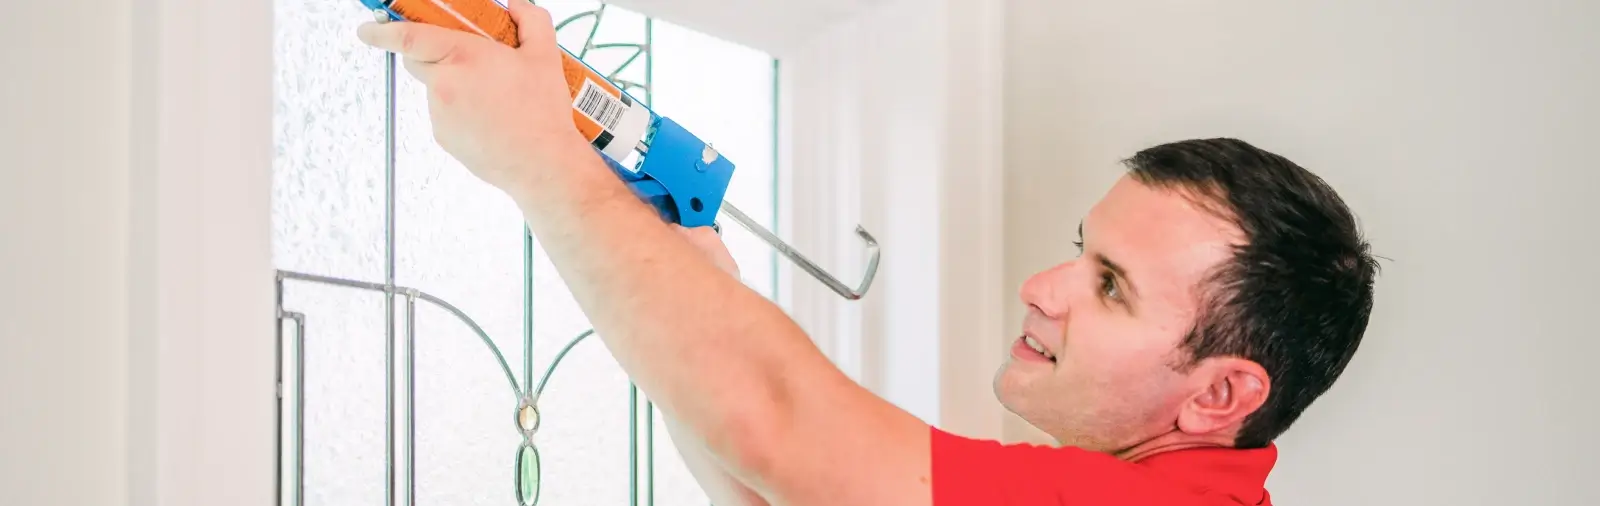
Caulk the inside and outside of windows
When dealing with older windows, professional window repair experts know it’s best to apply caulk to the interior and exterior of windows. Windows require a seal on both sides to avoid air leaks and moisture problems. A caulk gun will ensure you fill gaps and get a clean line.
Use the correct caulk for the job
There are numerous types of caulk for windows, and each works best in a particular environment and based on specific usage. You’ll find exterior window caulk as well as sealant for the interior of windows, humid spaces, masonry siding, and other unique applications.
Caulk for the exterior side of windows must be durable and hold up to extreme weather changes. Interior-side windows need a caulk that doesn’t release harmful fumes. If you have a humid room, pick a mold-resistant and waterproof caulk. Masonry siding, often found in basements, requires a caulk compatible with both the window and masonry surface. If you have more questions, check with a local Mr. Handyman for advice.
|
Common Types of Caulk |
||||
|
Silicone |
Polyurethane |
Butyl |
Latex |
|
|
Adhesion |
Good |
Excellent |
Good |
Excellent |
|
Cleanup |
Solvent |
Solvent |
Solvent |
Water |
|
Suggested Use |
Paintable surfaces |
Joints and surfaces that tend to crack |
Metal-to-masonry joints |
Joints, interior cracks, and small holes |
|
Shrinkage |
Minimal |
Moderate |
Low |
Moderate |
Know when to caulk for the best results
The time of year will affect your caulking job. Caulk windows during dry weather when the temperature is above 45°F and when there is low humidity to prevent the caulk from separating and cracking due to swelling. Typically, the warmer the weather, the faster the caulk will dry and adhere properly, provided the humidity outside is not too high (above 80%).
Depending on humidity levels and ventilation, silicone and acrylic latex caulk on interior windows can dry within 30 minutes. While the outside temperature isn't as critical for indoor caulking, condensation on the inside of your windows may need to be remedied before you begin caulking.
If possible, caulk the window's interior when it's warm enough to open it and provide adequate ventilation.

Hire a Professional Window Expert for all Your Window Repair Needs
Installing new windows requires a lot of skill and knowledge, and caulking existing ones takes time and patience. One wrong move, and you may end up with broken glass, a damaged frame, or more work than you bargained for. Hiring a professional will save you time and prevent headaches.
Whether you need window installation, maintenance, frame repair, trust your local service professionals at Mr. Handyman. Each of our service professionals has an average of 10 years of experience, and we back every job with our Neighborly Done Right Promise®, which ensures you’ll be satisfied with our work.
Give your windows the treatment they deserve. Contact us online or call your local Mr. Handyman today!
This article is intended for general informational purposes only and may not be applicable to every situation. You are responsible for determining the proper course of action for your home and property. Mr. Handyman is not responsible for any damages that occur as a result of this blog content or your actions. For the most accurate guidance, contact your local Mr. Handyman location for a comprehensive, on-site assessment.
FAQs About Caulking Around Windows
For over 25 years, Mr. Handyman professionals have been helping homeowners and businesses repair, maintain, and enhance their space. We are a one-stop solution for everything on your to-do list. This includes answering your questions about home repairs, maintenance, and improvements. Here are answers to some of your most frequently asked questions about how to caulk windows.
What does bad window caulking look like?
Bad window caulking looks cracked, shriveled, or separated from the surface. Old or faulty caulk for windows won’t keep out moisture or air effectively, so if you spot cracked caulking around windows, it's time for a refresh by a professional.
What causes cracked caulking around windows?
Over time, sun exposure, temperature swings, and moisture can lead to cracked caulking around windows. When that happens, the caulk stops sealing effectively and should be replaced.
Why does caulking keep peeling away from my windows?
Poor surface prep, low-quality caulk, or improper application can cause peeling. If you’re dealing with bad window caulking, it may be time to start fresh with the right materials and know-how from a professional handyman.
How long does exterior caulk last?
On average, outdoor caulk lasts 5-10 years. But if you’re in a region with harsh weather, you may need to schedule caulking outside your windows more often.
How do you caulk windows from the inside without making a mess?
Tape the edges for clean lines, work in small sections, and keep a damp rag handy to wipe away excess. Learning how to caulk windows from inside gives you better control—and a neater result.