Understanding how to find a stud in the wall is essential for any home improvement project that requires securely hanging items or installing fixtures. Most homes are constructed with 2x4 or 2x6 studs, typically located on the sides of windows and doors. You'll often find a stud adjacent to most outlets and light switches. Additionally, the trim in your home, such as baseboards, crown molding, and other decorative finishes, is usually nailed into a stud.
Let's explore how to find wall studs both with and without a stud finder.
How to Find a Stud with a Stud Finder
Whether you're hanging artwork, bracketing a bookcase, or mounting a TV, using a stud finder is one of the most reliable and straightforward methods for locating wall studs. This tool makes it easy to find a stud in the wall, ensuring your shelves, fixtures, and other heavy items are securely anchored. Here’s how to use a stud finder effectively:
Understanding stud spacing
Before using your stud finder, it's helpful to know how far studs are apart. In most homes, wall studs are typically spaced 16 inches on center, though some may be 24 inches apart. Knowing this can guide you as you move the stud finder along the wall.
Preparing the wall
To ensure accurate readings, start by clearing the wall of any obstructions. Remove any hanging items and move furniture away to allow smooth movement along the surface.
Calibrating the stud finder
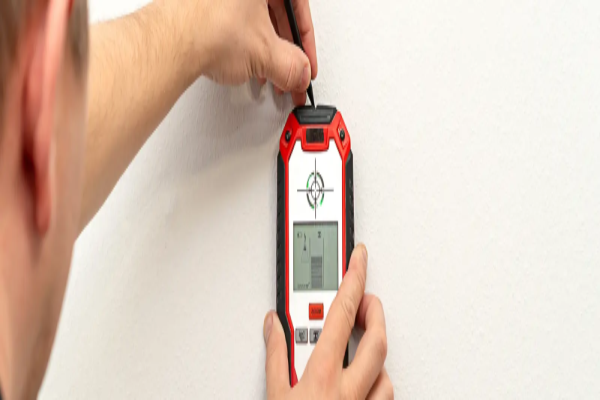
Turn on the stud finder and place it flat against the wall. Most stud finders require calibration before use. Hold the button until the tool is calibrated, usually indicated by a beep or light.
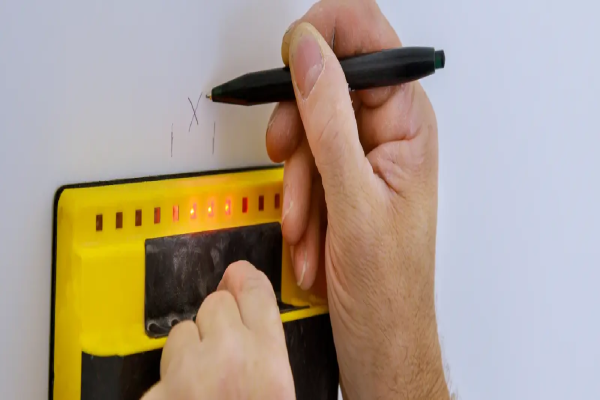
Scanning the wall
Slowly move the stud finder horizontally across the wall. When it detects a change in density, indicating a stud, it will signal with a beep or light. Mark this spot with a pencil, which is one edge of the stud. Continue moving in the same direction to find the other edge of the stud, then mark that spot as well.
Double-checking your findings
To confirm the stud location, measure 16 inches to the left and right from your marked spot and scan again. This will help ensure you have accurately found the wall studs and can plan your project accordingly.
How to Find a Stud without a Stud Finder
While a stud finder is a handy tool for this task, it's not the only option available. The following are some additional ways to find a stud without a stud finder.
The knock test
One way to find a stud without a stud finder tool is to knock or tap the area with a hammer or screwdriver handle. Knock gently, so you don't damage your drywall. Make sure the room is quiet so you can hear whether your tapping makes a hollow sound. A hollow sound indicates there is no stud present, so continue to gently tap to the left and right. When the sound becomes muffled, you've found a stud. To confirm, make a fist and hit the wall with the palm side of your hand. If it feels solid, that’s your stud. Mark the spot and measure 16" to the left and right to identify the rest of the studs, if needed.
Use a magnet
This method may seem a bit unorthodox, but it works. Use tape or dental floss with a magnet attached and drag it across the wall to find the stud. The metal screws used to secure the drywall are typically attached to a stud. Wait until the magnet sticks to the wall and mark the location of the stud.
If you have trouble finding the stud, try a stronger magnet. It’s also possible that your drywall is secured with adhesive instead of screws. If this is the case, you'll need to try a different stud-finding method.
Measure from the corner
Since studs are generally 16″ apart from center to center, finding wall studs works by using measurements that start in the corner of the room. Keep in mind that not all rooms are built with studs that are 16" on center, so there is a chance you’ll find a stud less than 16″ from one corner. Use the “knock test” near the corner to determine where the shorter stud spacing might be and to confirm the location of other studs.
Check the trim
The baseboards, door trim, and window casements in your home are usually attached to the studs. Check your baseboards to see whether you can spot where they have been nailed. These holes are usually painted over and filled with caulk, which often creates a dimple. When you locate one of these dimples, measure out in 16″ increments to locate the additional studs.
Use switch plates and windows as a guide
At least one side of an outlet and light switch will be mounted to a stud.. Windows usually have a stud on each side, but trim work can make finding the stud tricky. Start with outlets and light switches for the quickest and most accurate results. Tap the sides of the outlet to locate which side has the stud support. Measure about 3/4″ away from the outlet on the stud side and use that as a starting point to determine the 16″ intervals.
Try the “hit and miss” technique
This is the last option as it will create a small hole in your wall. Drive a thin nail into the wall where you suspect a stud. If the nail doesn't hit any wood, remove it and insert a wire hanger into the hole. Twist the hanger inside the cavity until it hits the nearest stud. While it’s still in the wall, pinch the hanger with your fingers to mark how much of it is in the wall. For precision, pull the hanger out (while keeping your fingers as a marker) and measure the length of the hanger that was in the wall. Then, measure the same distance on the outside of the wall to mark your stud.
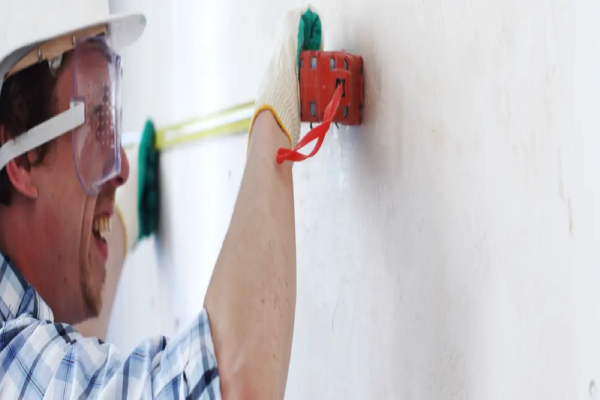
Safety Concerns: Ensuring You’ve Found a Stud and Avoiding Hazards
When it comes to finding a stud in the wall, safety is paramount. Properly identifying the stud ensures that your fixtures are securely mounted and helps you avoid potential hazards, such as wiring or plumbing hidden behind the drywall.
Confirming stud location
Once you've identified what you believe to be a stud, it's important to double-check your findings. Use multiple stud-finding methods—such as the knock test, measuring from known stud locations, or using a stud finder—to verify the stud's position before proceeding with any drilling.
Turn off power
Electrical wires often run vertically along studs, so it's crucial to be cautious. Before drilling, turn off the power to the area as a precaution. Use a voltage detector to scan the wall for any electrical currents. If your stud finder has a wire-detection feature, use it to help identify and avoid wires.
Steering clear of plumbing
Pipes are typically found in bathroom and kitchen walls. Be especially careful in these areas. If you're unsure about the presence of pipes, consult the building plans if available, or consider seeking professional advice to avoid accidental damage.
By taking these safety precautions, you can confidently proceed with your project, knowing that your wall fixtures will be securely and safely installed.
Simplify Your Project with the Help of Mr. Handyman
Still having trouble finding studs Mr. Handyman® can help!Every job comes with an experienced professional and our Neighborly Done Right Promise®.
Contact Mr. Handyman to request service today.
This article is intended for general guidance only and is not applicable to every situation. You are responsible for determining the proper course of action for your property and situation. Mr. Handyman is not responsible for any damages that occur as a result of advice and/or guidance derived from its blog content.
Some Mr. Handyman services vary by location. Contact your local Mr. Handyman franchise for more information.