Lately, if you’ve noticed the color of your grout lines is fading away or getting darker when it's wet, it’s most likely the seal is broken and you require a grout repair or replacement. Apart from this, loose pieces of tiles, mold growth, and crumbling could be from either improper installation or general wear and tear and will also need repairs. On average, grout can last you up to 16 years, depending on your effort towards routine maintenance, including grout cleaning at least once a month to scrub away any stains with a clean toothbrush, using a paste made of white vinegar and baking soda.
Grout can also be easily damaged due to multiple reasons, from a heavy piece of furniture being dragged across its surface to using harsh chemicals or unsuitable cleaners like bleach, baking soda, or store-bought varieties. Or it can even be from not cleaning enough or properly, for example, using incorrect tools like a steam mop in which added heat and humidity can soften grout.
Types Of Grout
- Sanded Grout: This is made of very fine particles of sand, so it tends to shrink less as a compact material. It’s great for handling high volumes of pressure, so it’s best reserved for tile flooring installations and works well for larger tile joints.
- Unsanded Grout: This is more smooth and textured and doesn’t scuff up too readily, making it best used for more fragile surfaces such as natural stone or marble. However, it won’t do well under lots of pressure, so it’s best used for your bathroom, shower, or kitchen backsplash.
- Epoxy Grout: This is the most expensive but flexible of all materials as it doesn’t shrink or discolor and is more resistant to abrasive cleaners. It also does grout sealer and is more durable, being resistant to stains, grease, acids, cracks, and local weather conditions. Epoxy grout is best reserved for high-spill areas, including your kitchen countertops or shower.
Our Certified Grout Repair Process
One area of expertise for grout repair is binding tile joints which are usually requested for tile floors due to constant foot traffic rendering them more susceptible to cracks and fractures. Because this is a cement-based substance, you simply can’t cake it on with another fresh layer of grout to cover up any cracks or holes. Instead, the previous, damaged, and old grout will need to be removed using a carbide-tipped grout removal tool. This tactic takes hand dexterity because if you’re not careful, you can easily damage surrounding tiles. After removing the damaged sheets during tile repair, we will apply a fresh coat of grout and smooth it out using a float, and once completely dried off, we will use a damaged sponge and tepid water to wipe the surface clean, including any clinging haze. Here are some of the steps we take for a grout replacement for your walls or floors:
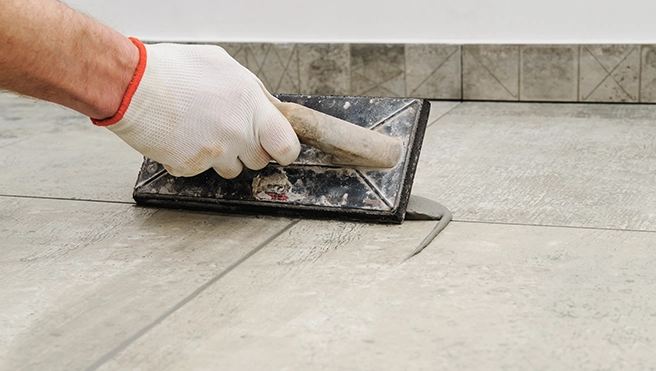
- Prep Is Best: After you have selected your preference for a material, we will prep the concoction using a margin trowel to mix the grout with clean water to form a cement-based paste. Excess water or cement could cause trouble later, but we always double-check for the appropriate consistency and only add any additives if required.
- Locked And Loaded: Our Boulder handyman will load up the float and scrape off the excess on the side of the bucket. We only take sample amounts to prevent spilling onto the floor.
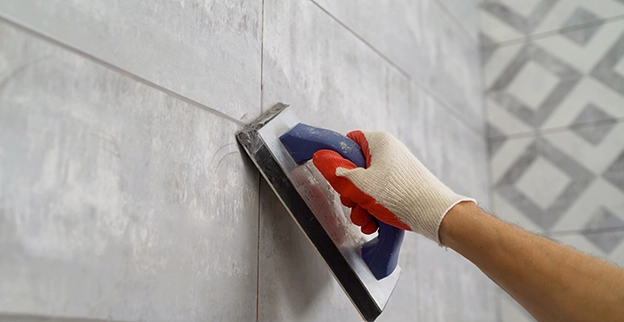
- Take Your Positions: Now we will apply the grout to the void in between by pressing down on the joints at a 45-degree angle and slowly press the float into the joint and run it along the entire length of the line. We will repair this process by being sure to skip specific areas like expansion joints which are located at the edges of a floor or wall, or areas that are more exposed to water, like the outskirts of a bathtub, shower, or standing faucet.
- Dry It Off: Wait about 20 to 30 minutes to allow it to dry, and then clean over the leftover haze with a damp sponge using lukewarm water. Our Boulder handyman team knows how to properly do this in a circular motion, so the wet sponge doesn’t affect the repair. One approach we use is the give-and-take method. That is, as we apply small amounts of grout, we wipe off the excess as we go along after each swipe to ensure better and more precise application.
- Nice And Smooth: We will now even out any lines by pressing down more firmly to ensure the lines have a similar depth.
- Haze Away: After it has completely dried off, we wipe the tile down with a microfiber cloth or cotton towel as a finishing touch to ensure no haze is left behind after repairs.