In addition to our installation services, you can also reach out to our reliable team whenever you're facing tile damage and need tile repair. Charleston, WV homeowners can call us to replace broken tiling or re-grout discolored sections to prevent costly damages and health hazards with underlying risks of mold growth.
Contact us today to explore the perfect tile installations that redefine living spaces with our Kanawha Valley handyman.
Top Services for Tile Repair and Tile Installation Charleston, WV
If you want to enhance your home with tile flooring, our team of experts at Mr. Handyman of Kanawha Valley can perform tile installation. Charleston, WV homeowners trading their old kitchen flooring out for durable tile can call us to schedule their tile installation project. From common porcelain or ceramic tiling all the way to luxurious marble or stone slate tiling, we have all the expertise to ensure you have beautiful and long-lasting floors!
The Process of Charleston Tile Installation
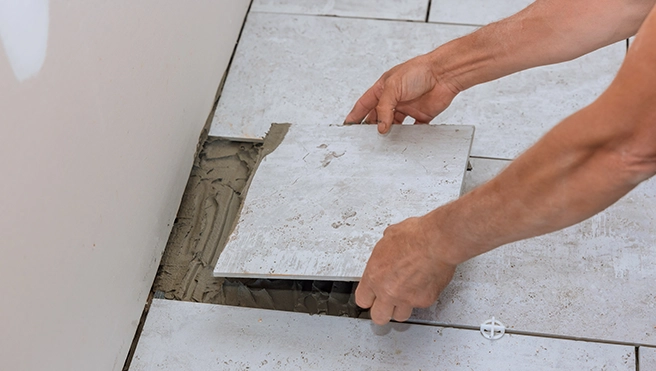
The installation of tiles is a meticulous process carried out by the skilled professionals at Mr. Handyman, ensuring a resilient, visually appealing, and enduring tile surface. The initial step involves surface preparation, where our tile professionals meticulously clean, dry, and level the area slated for tile installation. Subfloors are inspected for structural soundness, and when necessary, a suitable underlayment or backer board is applied, especially in moisture-prone spaces like bathrooms.
Next comes the crucial stage of layout and planning, where our experienced tile installers strategically plan the arrangement of tiles, considering the room's dimensions and any specific design preferences. Precision is maintained during the cutting of tiles, as our team of experts measures and cuts tiles as required to fit around corners, fixtures, and electrical outlets, utilizing tools such as wet saws or manual tile cutters.
Preparing the mortar or adhesive mixture is a key step, with mortar typically employed for floor tile installations and adhesive commonly used for wall tiles. Using a trowel, our service professionals then meticulously apply the mortar or adhesive to small surface sections. Tiles are carefully laid onto the mortar or adhesive bed, ensuring proper adhesion, with tile spacers utilized to maintain consistent gaps between tiles for future grout lines.
The grouting process begins once the tiles are set and the mortar or adhesive has cured (usually within 24 to 48 hours). Tile spacers are removed, and grout material is pressed into the gaps. Any excess grout or adhesive on the tile surface is promptly removed to achieve a pristine finish. The subsequent cleaning phase involves wiping the tile surface with a damp sponge approximately 15 to 30 minutes after grouting to eliminate any grout haze.
In the final stages, our expert tile installers thoroughly inspect the job site, checking for any loose rows of tiles or uneven floor tiles. Adjustments, such as tile leveling, are made as necessary. The installation is then left to cure and dry completely before it is subjected to heavy use or foot traffic, ensuring the longevity and durability of the tiled surface. Mr. Handyman's comprehensive approach to tile installation guarantees a visually stunning outcome and a surface that stands the test of time.